Building a Monkey candle: example
Here are some pointers.
Both approaches can be labeled Box Modeling
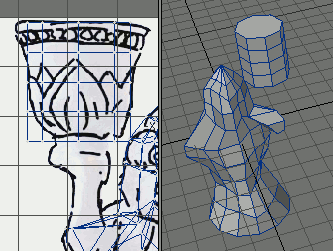
 First step of course is loading the image planes (via display → backdrop → image). What Is confusing at first is that the image in the front view (Lower Right) is mirrored. This is correct: the front view is looking TOWARDS the front. Switching it to a back view will flip the image again, this might be clearer.
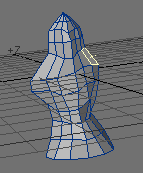
Since is seems to resemble the basic shape the most, I start with a cylinder (Create → Primitives → Disk), draw the disk in top view, and pull it out. I do not need the standars amount of subdivisions, but choose 12 sides, 8 segments (easily accessible from the numeric tool (n)
Since the top and bottom are big, multi edge polygons, I want to subdivide them. I select the top and bottom polygon and choose Multiply → Subdivide → More → Make Pole. I then select the newly created edges, an subdivide them using Multiply → Subdivide → Divide. The new points are automatically selected, I connect them using Construct → Combine → Connect. Using Modify → Translate → Drag (CTRL-T) I make the top of the cylinder pointy, and a create hole in the bottom
 Next I start dragging points round in the front view. It is set to wireframe mode (or color wireframe, so when I drag a point, bit the fron and back side ponts are translated. I make it roughly resemble the outer shape, making sure to keep a somwhat even spacing between the segments. I will try and mach some of the inner contours as well. The result is the second image shown on the right (I pushed up the brightness of the background image in the front view. And disregard the selected polygon, we're not there yet)
 I do the same in the side view, but first switch that view to Hidden Line mode. This way, I drag around the points on one side of the object only. Then I switch the lower left viewport to display Left and change the backdrop to shof the image of the left side. Again I drag the points to fit the shape. I only drag them in the side view, just like I first only dragged them in the front view
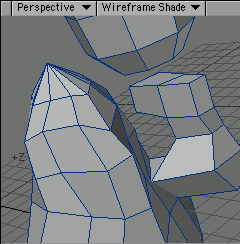
 Now that I have this basic shape (left) I select the "shoulder" polygon where the arm should come out and pull it out using Multiply → Extend → Bevel (b) - see 'animation' on the right
 To build the candleholder, I create a cylinder the same way I created the one I used to form the main part of the model. It needs a little less detail, I choose
8 Sides and 4 Segments. To pull it into shape, I select the top row of ponits on the cylinder. Using Modify → Transform → Size (SHIFT-H) I can scale those points the same way in all directions. Choosing Modes → Action Senter: Selection (SHIFT-F8) will ensure that it scales in all directions realtive to the center of the selection. This will also keep the thing symetrical
To build the candleholder, I create a cylinder the same way I created the one I used to form the main part of the model. It needs a little less detail, I choose
8 Sides and 4 Segments. To pull it into shape, I select the top row of ponits on the cylinder. Using Modify → Transform → Size (SHIFT-H) I can scale those points the same way in all directions. Choosing Modes → Action Senter: Selection (SHIFT-F8) will ensure that it scales in all directions realtive to the center of the selection. This will also keep the thing symetrical
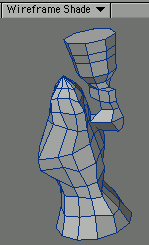
 I select the top polygon of "arm". Using Bevel I pull out three sections. Selecting the top af the new arn, I rotate the top so one poly faces staight back. Selecting this polygon, I pull it out with bevel to from the hand
Then I select opposing polygons: the top of the hand i jsut created, and the bottom of the candlelder. The I connect them using Consturct → Combine → Bridge
The only thing to do is to make a hole in the top of the candleholder, thei can easily be done by selecting the top polygon, beveling it in, beveling it again, now pulling it down. Finally I subdivide the polygon now at the bottom of the inside of the candleholder using Multiply → Subdivide → More → Make Pole, just like I did with the bas shape cylinder
 Finally I hit TAB to subdivide the result. Hey, it gets smaller!
Yes, but I will be adding detail, that will make it grow again: more detail will make the subdivided surface more closely follow the polygonal hull shape.
Finally I hit TAB to subdivide the result. Hey, it gets smaller!
Yes, but I will be adding detail, that will make it grow again: more detail will make the subdivided surface more closely follow the polygonal hull shape.
You see the monkey starts taking shape, specially after adding some more details like the left leg, right shoulder and face.